How I Schedule Blog Posts with GitHub Actions and Netlify
6/19/2023
In this blog post, we'll explore how to effortlessly schedule and publish Markdown notes daily using GitHub actions and Netlify builds.
The key here is to ensure that the posts are scheduled in Markdown while also verifying that their date is in the past on an Astro-based blog. This process allows for seamless publishing without any delays.
To achieve this, follow these steps:
- Utilize GitHub actions to deploy a Netlify build.
- In your Astro-based blog, check if the post's date is before today.
- Confirm that the post has been published.
By following these simple steps, you can easily manage your scheduled posts and keep your content flowing smoothly.
Prerequisites
Let's discuss prerequisites. To achieve this, you'll need:
- A method to fetch your blog posts.
- Blog posts with live or published dates and a "published" status.
- A static website deployed for time-specific builds.
- A GitHub account and repository to utilize GitHub Actions.
Objective
- We want to be able to write content in Markdown.
- We want to be able to write and commit blog posts to our code base without having to consider if the commit is for the day it's being published on.
- We also want to automate daily builds so that we can focus on writing and working on our blog and not manually having to remember to be around.
Step-by-Step Guide to Setting Up The Infrastructure for Scheduling Blog Posts
To create a well-structured blog, follow these steps:
- Write your blog post in the content directory.
- Develop a TypeScript utility to filter out unpublished posts or those with future publish dates.
- Implement a GitHub workflow for daily website builds.
Info
This post is written for an Astro based blog, but can be used with any workflow that has a way to get your posts with Markdown metadata. I used this workflow in my NextJS blog as well.
Step 1: Write A Blog Post
The two important pieces for this to work are that you have status and pubDate.
status: The status of the post. If it's ready to ship, it'spublished. Otherwise it can be anything else you want it to be. I useDraft,Editing,Published.pubDate: The date you want this post to publish. In this example, it should be in the future.
---
title: Scheduling Posts
status: published
pubDate: 2024-01-01
---
This post was written and committed to the `git` repostory on 2023-06-16
Now that you have your blog post, it's time to move on to writing the TypeScript utility.
Step 2: TypeScript Utility For Getting Posts That Have a Published Status and Past Publish Dates
Now it's time to create a TypeScript utility called src/utils/getPosts.ts that will do the following actions:
- If the Node environment is
DEV, serve all posts - If it's not
DEV...- filter any posts that are in the future out
- filter any posts that aren't
Publishedout
Danger
There are two Astro specific concepts in this file:
getCollectionandimport.meta.env.DEV.getCollection If you're using NextJS, you'll probably be using some alternative functionality to
getCollectionthat does areadDirSyncand fetches all of your posts.import.meta.env.DEV This is the Astro equivalent to
process.env.NODE_ENV === "development".Make sure to approach this post with that in mind and update accordingly for your framework.
The code for src/utils/getPost.ts looks like this:
import { getCollection } from "astro:content";
import { isBefore, parseISO } from "date-fns";

export const getPosts = async (props = {}: { limit?: number } = {}) => {
  let allPosts = await getCollection("posts");

  if (!import.meta.env.DEV) {
    allPosts = allPosts
      .filter((p) => isBefore(parseISO(p.data.pubDate.valueOf()), new Date()))
      .filter((p) => p.data.status.toLowerCase() === "published");
  }

  const posts = allPosts.sort(
    (a, b) =>
      new Date(b.data.pubDate.valueOf()) - new Date(a.data.pubDate.valueOf())
  );

  if (props?.limit) return posts.slice(0, props.limit);

  return posts;
};
In it, I do the following...
- Import
getCollectionfromastro:contentso I can work with my collections - import
isBeforeandparseISOfrom date-fns so I can work with dates. - export a function called
getPoststhat takes an optionallimitso I can get just the number of posts I want.- Get all the posts with
getCollection("posts") - Check if I'm in
DEV(so I can serve drafts when I'm working on them)- If I'm not in `DEV...
- filter to only the posts that have a date before the current date
- filter to only the posts that are
published.
- If I'm not in `DEV...
- Sort the posts by newest publish date
- If
limitis passed in, slice the posts to the number requested and return - Return the posts
- Get all the posts with
Now that we have the getPosts util, it's time for me to call it anywhere where I fetch posts with getPosts(). I've done that in my pages/posts/index.astro.
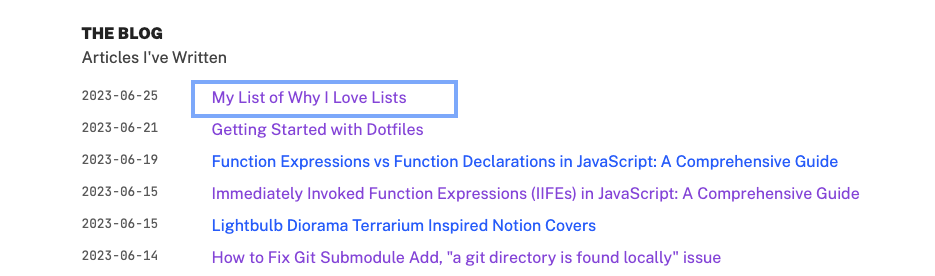
Now, if I start my dev server (which sets the meta.env to DEV, I'll see that the new post is included in my posts list.
Now to test that my future posts with status as Published don't show up in the list, I run npm run dev with env NODE_ENV=production in front of it:
env NODE_ENV=production npm run dev
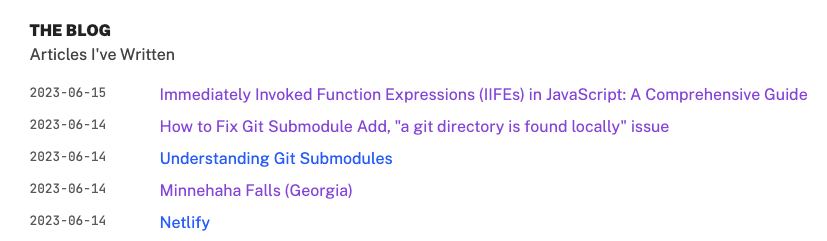
Now when I check the same page, I see that my future dated posts don't show up in my list
Now that we're all set with the util for getPosts(), it's time to work in GitHub!
Step 3: Setup GitHub Action
Info
This blog post assumes that you're working in a pre-existing project that lives in GitHub and is setup to deploy with Netlify.
If your project is not version controlled with
git, pushed to a GitHub remote that triggers a Netlify build already, make sure to do that now!
The last thing we need to do is to add a GitHub Action that will do a daily build.
In order to do that, we need to do the following steps:
- Create a Build Hook in Netlify
- Add a
.github/workflows/daily_build.ymlto our repository root.
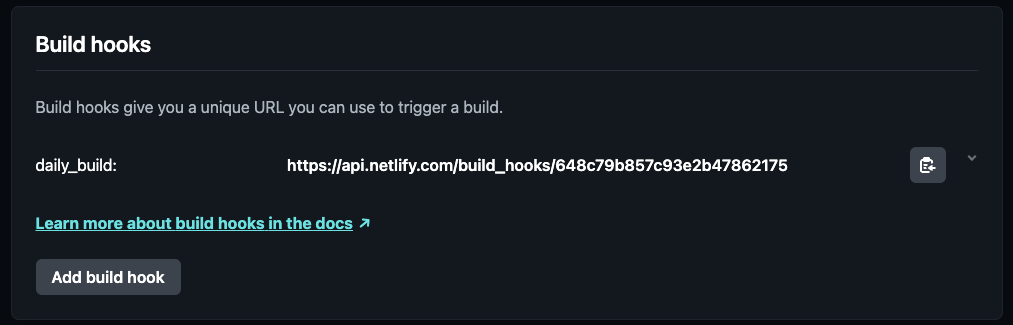
Setup Netlify Build Hook
To create a build hook in Netlify, follow these steps:
- Access your Netlify dashboard and click on your current project (e.g., curiouslychase.com).
- Click Site Settings in the sidebar.
- In General panel, navigate to Build & Deploy.
- Scroll down to find Build Hooks and click Add Build Hook.
- Name your build hook (e.g., Daily Build) and set the branch to build as
main. - Save your changes.
You'll now see a new build hook with a copy button next to its URL. Copy this URL for use in your GitHub project integration process.
Now it's time to create your GitHub Action!
Create GitHub Action
In your project root, create the following path: .github/workflows/daily_build.yml.
Once you've created this file, you need to give your workflow (previously called "action") a name.
We'll name it "daily-build".
Now we're going to leverage a cron job type GitHub Action:
on:
  schedule:
    - cron: "1 12 * * *"
This tells the action that "on" a "schedule", we want to run a cron for every day at 12:00PM UTC.
Now we need the job to run:
jobs:
  build:
    runs-on: ubuntu-latest

    steps:
      - name: trigger netlify build
        run: |
          curl -X POST -d '{}' <<YOUR BUILD HOOK>>
In the code above, we have...
- defined a job named "build" that will run on "ubuntu-latest"
- told it that it has one step called "trigger netlify build" that runs a curl command
- The curl command is hitting the build hook that we created previously in Netlify
Here's the full YAML file content:
name: daily-build

on:
  schedule:
    - cron: "1 12 * * *"

jobs:
  build:
    runs-on: ubuntu-latest
    steps:
      - name: trigger netlify build
        run: |
          curl -X POST -d '{}' <<YOUR BUILD HOOK>>
Now that you've created this, you're all set for a daily build of your scheduled content!
Tip
You can use a webhook here as a raw string, but you can also use a GitHub environment secret for GitHub Actions if you want to make the URL access more secure.
Wrapping Up Scheduling Markdown Posts with GitHub Actions and Netlify
I hope that this post helped you figure out your own scheduled posts.
Not only did we go through scheduling posts in a way that hopefully helps you publish your own Markdown file based content, but we went through the process of learning how to automate certain tasks that we don't have to be involved in.
Stay curious and keep automating the drudgery!